December 30, 2006

A History of England from the Tudors to the Stuarts


Rating:★★★★★
Category:Books
Genre: History
Author:Professor Robert Bucholz

If you’re the kind of person who has considered going back to school “just for fun” then you’ll understand my excitement when I tell you about some fantastic classes I’ve taken lately while running errands and folding laundry. The Teaching Company invites highly recommended professors in various fields of study to develop a specific lecture series which is then made available on cassette tape, CD, video tape and DVD.

I recently finished listening to the series, The History of England from the Tudors to the Stuarts, by Professor Robert Bucholz. Despite the fact that history was my most despised subject in junior and senior high (with the exception of AP History my junior year), this class was riveting. Bucholz is an engaging speaker, including delightful asides that add flavor and texture to his narratives. He is clearly excited by his subject matter and thrilled to be sharing it with others.

Though this class concerns the Tudors and the Stuarts, Bucholz backs up to 1377 when Edward III dies and is succeeded by his grandson, Richard II. The fighting between the Lancastrians and Yorkists (which later came to be referred to as the War of the Roses) made for not only political turmoil during that time period but confusing listening for me as the student. I played some of these early tapes twice to make sure I understood what was going on. (Bucholz even apologizes for the confusion, although the real problem was that there were really too many Richards, Edwards and Henrys for the countries own good.)

Finally Henry VII gained the upper hand and the history of England settled into a time line that was a bit easier to follow (with the exception later on of a few too many Marys. Honestly, these people needed some fresh “What to name your baby” books. They had an utter lack of imagination when it came to naming their children.)

Bucholz, of course, covers some rather notable monarchs in this class, such as Henry VIII, Queen Mary I, and Elizabeth I. (I have to be honest, before this class, these three, along with perhaps, Queen Victoria and Queen Elizabeth II, were the only kings or queens that I had even a glimmer of knowledge about.) I think it’s safe to say that these three notables carry a lot of baggage with them. For example, who doesn’t think “Bloody Mary” upon hearing of Mary I or think of Henry VIII lopping of the head of one wife in order to go marry another? Yet I believe that Bucholz did a great job of rounding out these well knowns, delving into the motives behind their actions (Henry VIII was worried about not leaving a male successor. The thought of Mary or Elizabeth being left as the heirs to the throne haunted him.) as well as comparing the monarchs so that the actions of one could be seen more clearly in light of the actions of the others. (Elizabeth killed just as many Catholics as Mary had killed Protestants, but Elizabeth was the one that got to write the history books on Mary and she found it convenient to add the adjective “bloody” to her sister’s name.)

Likewise, I think Bucholz covered the ridiculous amount of religious turmoil quite evenly, neither ridiculing nor exalting any of the factions, but simply explaining where they were coming from, what their goals were, and how utterly unsettling all of this religious change and upheaval was for a people who had quite comfortably been, well, whatever the king or queen had been at the time. The civil war and the time of Cromwell led to an amount of religious freedom that, in the end, the country simply couldn't tolerate. Even those who had led some of the changes realized it was all too much. Yet, as easy as it would be to look rather contemptuously upon much of the religious proceedings during these times, I felt that Bucholz remained well above the fray, relating the events clearly without soaking them first in his own prejudiced spin.

I listened to this tape series during the Autumn of 2006 and visited England in January 2007. It was exciting for someone to mention Warrick castle and the first thing that would pop into my mind wasn't "What castle?" but "Ah! Warrick, the King Maker!" The places we visited on our trip had more meaning since I could relate to them with some sense of historical context that I simply wouldn't have had otherwise.

I listened to this class on cassette tape and it worked well in that format. But I suspect that I missed out on several portraits of kings, queens, and other notables that would have been nice to see. Each box of tapes comes with a booklet filled with outlines of the lectures, but unfortunately, pictures are not included.

In the back of each booklet is a bibliography with the books and other resources sorted into categories such as "Essential Reading" and "Supplementary Reading" as well as by time period or location.

Other resources that I discovered in my study of English history:

A rockin' time line of Britain by the BBC
A family tree of the British monarchs on wikipedia

This was an excellent class and I highly recommend it. Not only is the time period that is covered fascinating, but as Professor Bucholz points out in his closing lecture, many of the struggles that the English went through during this time led directly to the philosophies and values that led to the founding of the United States of America soon after. And Professor Bucholz's enthusiasm for his subject matter is infectious. He's a delightful orator and I must confess that his fervor in his closing remarks were almost enough to make me climb upon a table and shout, "I'm proud to be English!" (despite the fact that I'm nothing of the sort, being far more Ukrainian than anything).

December 28, 2006

Cherry Custard Pie

Description:
When I was a kid (probably in 4th or 5th grade) I snuck a cherry out of this pie as it was cooling on the counter. My parents discovered the missing cherry and asked me if I'd eaten it. I said, "Oh no! That was Karen!" (my sister) Unfortunately for me, everyone knew that this was my favorite pie and that my sister didn't care for it. So I got in trouble not only for stealing the cherry, but for lying about it afterwards. doh!

Ingredients:
1 9 inch unbaked pie shell
2 T flour
1/4 c sugar
2 eggs
1/2 c. sugar
2 T flour
1/2 t vanilla
1/4 t salt
milk
1 can sour cherries

Directions:
Add 2T flour and 1/4 c. sugar to bottom of pie shell. Pour one can of drained cherries (the sour kind) and arrange in the bottom of the pie shell. In 2 cup measure mix with fork eggs, 1/2 c. sugar, vanilla and milk (added to make 1 1/4 c.) Pour over cherries.

Bake 10 minutes in preheated oven at 400 degrees. Reduce heat to 350 degrees and bake additional 40 - 45 minutes until custard is set.

(This recipe reads a bit weird. I wrote it down back in college and I obviously didn't have all of my brain cells functioning at the time or something.)

November 8, 2006

No-Knead Bread

Description:
This is from the November 8, 2006 New York Times food section -- "The Secret of Great Bread: Let Time Do the Work"

I've been waiting to post this until I took a better picture, but I haven't made this bread since last year, so you'll have to be content with what I have. I'm only posting this now because my mom wanted a copy of the recipe and I've had this is "draft" mode since November or so.

Ingredients:
3 cups all-purpose or bread flour, more for dusting
1/4 teaspoon instant yeast
1 1/4 teaspoons salt
1 5/8 cup water

Directions:
1. In a large bowl combine flour, yeast and salt. Add 1 5/8 cups water, and stir until blended; dough will be shaggy and sticky. Cover bowl with plastic wrap. Let dough rest at least 12 hours, preferably about 18, at warm room temperature, about 70 degrees.

2. Dough is ready when its surface is dotted with bubbles. Lightly flour a work surface and place dough on it; sprinkle it with a little more flour and fold it over on itself once or twice. Cover loosely with plastic wrap and let rest about 15 minutes.

3. Using just enough flour to keep dough from sticking to work surface or to your fingers, gently and quickly shape dough into a ball. Generously coat a cotton towel (not terry cloth) with flour, wheat bran or cornmeal; put dough seam side down on towel and dust with more flour, bran or cornmeal. Cover with another cotton towel and let rise for about 2 hours. When it is ready, dough will be more than double in size and will not readily spring back when poked with a finger.

4. At least a half-hour before dough is ready, heat oven to 450 degrees. Put a 6- to 8-quart heavy covered pot (cast iron, enamel, Pyrex or ceramic) in oven as it heats. When dough is ready, carefully remove pot from oven. Slide your hand under towel and turn dough over into pot, seam side up; it may look like a mess, but that is O.K. Shake pan once or twice if dough is unevenly distributed; it will straighten out as it bakes. Cover with lid and bake 30 minutes, then remove lid and bake another 15 to 30 minutes, until loaf is beautifully browned. Cool on a rack.

October 28, 2006

Wit

Rating:★★★★★
Category:Movies
Genre: Drama

This past spring, a woman in our church started to experience severe chest pain. After several visits to the doctor and a CT scan, she was diagnosed with ovarian cancer. She was immediately operated upon and her ovaries, as well as several other tumors located throughout her abdomen, were removed. The surgeon was unable to reach all of the cancer and chemotherapy was prescribed.

It is now 5 months later. After two surgeries, a short recovery period and a full course of chemo, she is in full remission. She’s back at work teaching 5th graders not just their usual coursework, but about cancer as well (and germs, as her immune system has been suppressed due to the chemo).

This experience has been incredibly hard on their family, as well as on our church family. In September, national Ovarian Cancer month, the women of the church got together and made bookmarks that listed several warning signs of ovarian cancer (pain in the abdomen, a feeling of being bloated, fatigue, weight loss, or problems with urination). The women also made teal ribbons to wear in support of the battle that this family has fought, and so far won.

Wit is a movie about ovarian cancer. Like this gal in our church, the main character’s cancer wasn’t detected until it had progressed well beyond the ovaries. Having progressed so far, the best medical option appears to be a research program that uses a highly potent new form of chemotherapy over an 8 month period.

Vivian Bearing, played beautifully by Emma Thompson, is a scholar. She has devoted her life to poetry, specifically that of John Donne. Her journey through cancer, through treatment, and through hospital life is chronicled poignantly by Bearing’s frequent explanations and asides to the viewer. It is clear that this movie was made, not just to pull at our heart strings, but to educate us about the trials of cancer and cancer treatment as well.

Bearing, a somewhat harsh professor herself in the past, becomes victim to the dehumanizing requirements of being a guinea pig in a university research hospital. The contrast of how Bearing has lived her life in the past -- completely self-assured and needing no one else -- to her situation in the hospital -- at the mercy of the staff, alone and scared and wanting more than anything a little human comfort -- adds an underlying moral to the story. Though Wit doesn’t hold the cathartic Carpe Diem intensity of a movie like Dead Poets Society, it still radiates much of the same message, adding to it a gentle and loving aside concerning the precious nature of life and the respect that should be shown toward all humans.

My only complaint about this movie is that it provided a perfect opportunity to inform women about the early warning signs of ovarian cancer and didn’t use it. Even a block of scrolling text at the end of the movie would have been helpful in encouraging women to get yearly checkups and pointing them toward early stage symptoms to be aware of.

All in all, the movie was stunningly acted, had several witty moments in addition to the harsh realities of life with cancer, and allowed the viewer to become an eyewitness to a story that 1 woman in 50 will likely live out.

August 16, 2006

Transportation 101

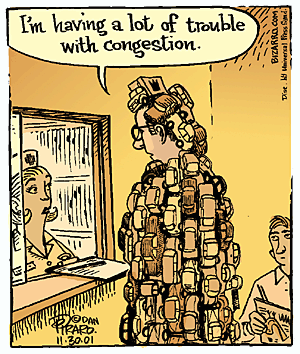
This is another entry from my old (and soon to be expiring) website. I suspect that it's pretty much guaranteed to mess up my formatting since it begins with a large table (that fit fine on my old page, but I'm a little more *pushes out with each elbow* confined over here).

This post was originally made in the Winter of 2001 and some of the cartoons hold a bit more irony today than they probably did back then.

oh, and again, no promises on the links.


Transportation 101


Transportation


Approx. cost to
traveler


Approx. cost to
government


Approx. cost to
society

walkingcost of shoes ($50)cost of paving sidewalkpositive health benefits

increased productivity
bikingcost of bike ($250)cost of paving bike lanemedical costs of people
who breath in (minimal) bike tire dust
driving
cost of car ($15,000)


cost of gas

cost of auto registration

cost of drivers license

cost of auto insurance

cost of paving streets and highways


cost of lights, stop signs, etc.

cost of police to enforce speed limits

cost of meter maids to enforce parking limits

health costs that aren't covered by individuals

items to address noise issues

cost of legislators to develop laws regarding travel


cost of clean up from spilled oil

cost of department setup to oversee auto registrations,
drivers' testing, etc.


medical costs of people who breath
in car tire dust


medical costs of people who breath
in car exhaust


medical costs of people
who live near auto factories


medical costs of people who are affected
by spilled oil


(not to mention the loss of beauty as the earth gets
paved over, etc.)

driving +

(SUV's, clunkers, etc.)
lower mpg leads to greater gas costs

dittogreater damage to environment leads to increased
medical problems

increased risk of a fatality in an accident
(leads to lower productivity since the dead guy can no longer
work)


Medical Effects

* Walkers have less incidence of cancer, heart disease, stroke, diabetes and other killer diseases.

* smog can cause birth defects

* living near auto factories creates a higher likelihood of children having cancer


* more people are being killed by air pollution from traffic than from
traffic crashes each year
(and again) (and again)

* auto exhaust can lead to respiratory ailments

* tire dust can lead to rhinitis (runny nose), conjunctivitis (tearful
eyes), to hives (urticaria), bronchial asthma, and occasionally
even a life-threatening condition called anaphylactic shock

(and again)

* tire dust can build sensitivities to latex (and again)

* auto traffic stirs up pollens and molds and may therefore worsen
asthma and hay fever


* ground level ozone can irritate the respiratory system, reduce lung
function, aggravate asthma, and/or inflame and damage the lining
of the lung
(and again)


* nationally
there are approximately 18.1 auto-accident-related deaths per
100,000 people
(and
again)


* Compared with other vehicle types, utility vehicles experienced the highest rollover rates: 37.8 percent in fatal crashes, 10.0 percent
in injury crashes, and 2.5 percent in property-damage-only crashes.

* healthier employees are often happier and more productive (and
again)
(and again)
Environmental Effects (which often lead to Medical Effects)
* oil spills and leaks destroy the environment and may be closer than
you think
(more) (still more) (and a little more)

* air pollution is causing problems in national parks

* auto manufacturing produces great quantities of pollutants

* SUV's are allowed, by law, to produce more pollutants than passenger cars

* SUV's get crappy gas mileage (compare
the gas mileage for cars page to the best and worst of SUV's page)


August 6, 2006

Fruit Pastry

Description:
This is a great dish to make at the same time as the Zucchini Custard Pie since it'll help use up leftover phillo dough.

It's also pretty darn tasty.

Ingredients:
phillo dough
butter
fruit (frozen or fresh)
sweetener (honey, maple syrup, agave nectar, whatever)


Directions:
Butter the bottom and sides of the pan. (I used a "smaller than brownie pan" sized pan. I don't really know it's dimensions. But it fits neatly inside my 13 x 9 pan, if that helps.)

Layer phillo dough in the bottom of the pan, occasionally spreading melted butter over the layers. Build about 10 or so layers high. ... maybe more if you feel inspired.

Throw a bunch of fruit on top of the layers. I used frozen raspberries in the pastry shown here. (Frozen?!! In the middle of summer? Yup, and let me tell you why. The last 3 or 4 batches of raspberries that I've picked up at the store have had bad guys at the bottom that flavored the rest of the berries with that yucky, moldy berry flavor. I was sick of it and I didn't want to have to go picking through the berries. So there.)

Slather a bunch of honey (or whatever) on top of the berries. I probably used a cup or so of honey.

Cover the berries with several more layers of dough and butter.

Cook until the top starts to brown slightly.

(Dang! I just noticed that the hot pad underneath the pastry is showing. It makes it a little harder to tell where the pastry starts and the hot pad stops. Oh well.)

Zucchini Custard Pie

Description:
Last night I sat back after dinner and thought, "Dang, that was good. I rock."

Yes. Dinner was that good.

I was inspired by a feta zucchini tart that was in a recent issue of Saveur Magazine. But I didn't have all of the ingredients they listed (nor did I want to go through all the work that the recipe seemed to require) so I made up my own recipe.

Behold:

Ingredients:
phillo dough (i use an organic brand that's at the store, but what i'd really like to find some day is a whole wheat brand.)
butter. lots.
zucchini (i used 2 medium sized zucs but i probably should have used at least one more if not 2 more.)
1 diced onion
1 close garlic
salt and pepper to taste
5 or 6 eggs (or more. if i had added more zucchini i probably would have used more eggs. i think i used 5 eggs this time around.)
2 cups milk or cream (i used whole milk and that worked well.)
fresh basil

Directions:
Saute onion in a bit of butter. When the onions are almost translucent, toss in the zucchini. I had Naomi use the side of the grater (that makes slices) to cut the zucchini up. I cooked the zuc on low heat with a lid so that it steamed as well. I tossed the garlic in near the end. (I used our new little, itty, bitty garlic grater on the garlic. It worked really well.) Add salt and pepper to taste.

Coat bottom and sides of a brownie pan (I used a glass 13 x 9 pan.) with melted butter. Alternate layers of phillo dough and more butter. (I don't put butter between every single layer. But when I do put it on, I'm fairly liberal. Add as much or as little butter as you want. It's your waist line.) Make this layer as thick as you want. I probably used 10 - 12 layers of dough.

Chop up some feta. (Use as much or as little as you like. I didn't put any on the kids side but when they tried it with feta they liked it so next time the feta goes on the whole thing.)

Spread the feta out on top of the phillo dough. Then spread the zuc/onion/garlic mixture on top of that.

Beat the eggs and milk (and more salt and pepper if you'd like) and pour over the whole deal.

Wash and tear up a bunch of basil leaves (the more the merrier) and sprinkle over the top. I didn't add tomatoes but I think several tomato slices along the top would have been a great addition. (I just didn't have any on hand.)

Cook at 350 degrees F until the center is set. (It shouldn't jiggle or slide around.) A lightly browned top would be nice, though I don't think I let mine cook quite that long. We were too hungry to wait.

July 31, 2006

Whole Grain Goodness

The following is reprinted from my previous website. I've reformatted it to fit into this multiply-sized space, I've updated it here and there, and I've fixed some misspellings).

-----------------------

Whole Grain Goodness
Deciding to eat more whole grains is a big step for many people. But sometimes what is even more daunting is how to go about it. So below I have described a few of the things we have done.
The biggest step we have taken is to start grinding our own grain. We've made a few forays into the world of cooked wheat berries but I must admit that despite my best intentions, we don't eat them that way very often. So most of this page will have to do with grinding flour--how to get started and what to do with the stuff once you've got it.

Kamut -- Hard Red Wheat -- Pearled Barley -- Rye -- Spelt

Grinding Flour
Grinding flour sounds harder than it is and has a far greater payoff than you'd ever imagine. You can buy ground flours made from whole grains but you never know how long they've been sitting on the counter before you buy them. Their flavors simply aren't as fresh as when you grind the grain yourself and use it right away.

We happened upon grinding flour somewhat round-aboutly. We had been buying our pre-ground grains in bulk at Rainbow grocery (in San Francisco), but as the Y2K "threat" loomed we decided to buy some items (that we would use anyway) just in case. We figured it couldn't hurt to have a few gallons of wheat, rice, beans and popcorn lying about. We also bought a hand grinder (assuming that if the Y2K debacle was true, then we wouldn't have electricity to use to grind the grain. And if an earthquake came along instead, we'd be ready for that too). When we ran out of oat flour a few months before the New Year, we pulled out a 5 gallon tub of oats and gave the grinder its first run.
We found that hand grinding could be either relaxing or annoying, depending on whether we were in a hurry or not. Our 3 year old loved to play with the oat berries and turn the handle on the grinder. And it was impressive when we pulled out a tub of hard red wheat to see that not all grains grind the same. (The oats grind much quieter and more smoothly. The wheat seemed to be at least twice as loud and a tad harder to grind as it seemed to occasionally catch in the grinder.)

We began to get into a habit of grinding any time we were standing around talking to someone. That way we'd have flour set aside for later when we wanted to make cookies without having to stand there for a half hour grinding first. Eventually we broke down and bought a grinder -- a Whisper Mill made by Creative Technologies. We didn't research our purchase. We simply went with the electric grinder that was sold by the same company from which we'd bought the grain (Provident Pantry). It cost us over $200 (which floored us.... But by that time we were hooked on freshly ground flour.) If you'd rather do a little grinder research before shelling out your dough, you might want to check Walton Feed's page that compares different grinders.
We don't use store bought white flour at all (well, except for making play-dough and I've used it also for making pirogi) and only occasionally buy other preground flours (such as the occasional bag of garbanzo bean flour or quinoa flour). Our favorite general purpose flour so far has been hard red wheat. It's packed with flavor. In fact, we've had friends beg us for our chocolate chip cookie recipe only to have them be disappointed when we tell them to just look on the back of a bag of Nestle's chocolate chips. (They'd rather get a new recipe than start using better ingredients.)
We don't make our own bread. At least, not often enough to say that we do. (We might make bread a few times a year.) But we do make lots of cookies, pancakes, waffles, muffins and scones. We generally go through one jar (see the empty jar to the right of the Whisper Mill in the above picture) every week or so.
The Grinding Process
Turning berries into flour is quite simple. With a hand grinder you pour the berries in, turn the handle and the flour comes out. With the Whisper Mill, the process is the same though the experience is rather different. The Whisper Mill, despite the word "whisper" in the name, is quite loud. The flour also tends to get heated up a bit (though not enough, I don't believe, to remove nutrients or spoil the oils).
With both the hand grinder and the electric one, you can set the fine-ness (is that a word?) of the flour. In other words, if you're grinding something like corn and you'd rather make polenta rather than corn meal, or corn meal rather than corn flour, you can set the grinder to do exactly that.
Important things to think about:

* Berries have a habit of running for freedom. In other words, if you can spill some, you will, no matter how careful you try to be. So you may want to set the mill and bag/tub of berries inside a larger tub of some sort.
* When you grind the flour (with the mill, not by hand) you'll end up adding a bit of flour to the air which will settle back as a beautiful white dust all over everything in your kitchen. There are things you can do to keep this at a minimum (like make sure the container that the flour is shooting into is entirely closed. And don't try to grind too much flour at once).
* And as you transfer flour from the grinder to another container, you may want to put newspaper underneath the whole operation so that when you're done you can dump any fallen flour into the container as well.
Advantages of Grinding Your Own Flour

The greatest advantage to grinding your own flour is having fresh flour. It really does taste better. If you doubt me, then come over and try some of my chocolate chip cookies or some of Rob's waffles. Store bought flour is sometimes so old that it's rancid before you get it home. Whole wheat berries can stay fresh longer than whole wheat flour. (Remember, the whole reason that white flour became all the rage back in the early 1900's was because it was more nutritious, because it's not. It was because it will keep fresh several times longer than whole grain flour. But as far as I'm concerned, it doesn't matter how much longer white flour remains fresh, it's bad for your health and it tastes like glue.)
Another advantage that crosses my mind once in awhile as I'm grinding flour is that when I grind my own flour, I know exactly what bugs are (or are not) in my flour. I've heard that we eat several bugs a year that get ground into the food that we buy prepackaged. Yuck!
You can also grind as much, or as little, flour as you need. If you only need a half cup of some oddball flour twice a year, you can buy the grain whole (which will keep throughout the year) but grind the flour only when you need it (since it would probably be bad by the next time you needed it if its something you infrequently use).
And you can buy the grain in bulk which is cheaper than buying the preground stuff. (Granted, you have to shell out dough for that grinder, but if you go in on it with someone and share it, you'll save yourself a heap of dough.)
Eating Whole Grains Whole

You don't have to grind grain to enjoy its goodness. In fact, you've probably already had cooked, whole berries of grain and not even given it a thought. Brown rice is a whole grain cooked whole and steel cut oats are made from a whole grain that is almost whole (often only chopped into halves or thirds, not mashed or ground).
The Joy of Cooking has a quite helpful description of grains and how to cook them. Suggestions include toasting the grain first, cooking the grain in broth or some other liquid besides water, and combining several grains for flavor and nutrition. Some grains can be cooked in a relatively short amount of time such as rice and oats. Others require presoaking to help soften them. And grains can be eaten as is (such as in a porridge, what we American's would call "hot cereal"), as a side dish (as rice might be), or in a salad.
Different grains also provide different nutrients. Amaranth has more protein, iron, magnesium, and phosphorus than most other grains. Oats are known for providing fiber. Quinoa (pronounced keen-wa) is a complete protein. (Check out Gretchen's list of grains for more in-depth descriptions.)

Resources
Everything you've ever wanted to know about Scottish porridge (made with oats).

Recipes
Recipes from the low-fat vegetarian archive think apple-barley, kamut-biryani, and quinoa-vegetable-jambalaya

Descriptions of the grains with recipes to boot

July 29, 2006

Applesauce Muffins

Description:
I've made these three times this week (I'm trying to get rid of some applesauce.) and I don't have any left to take a picture of. But they look like plain old muffins, so I feel comfortable letting you use your imagination.

This recipe is taken from a book entitled Quick Breads, Soups & Stews, by Mary Gubser, which I found at the library. It has some wonderful muffin recipes in it.

Ingredients:
2 cups all purpose flour (I usually use freshly ground hard red wheat.)
3 teaspoons baking powder
1 teaspoon cinnamon
1/2 teaspoon nutmeg
1/2 teaspoon salt
1/2 cup brown sugar, packed
2 eggs, beaten
1/2 cup milk
1/4 cup melted butter
3/4 cup applesauce
1/2 cup chopped pecans or walnuts (I don't like nuts in my food so I leave these out.)

Directions:
Grease a muffin tin and preheat the oven to 350 F. (The cookbook says 400 F, but my muffins come out fine when cooked at 350 and I tend to set it there out of habit.)

In a mixing bowl, combine the flour, baking powder, cinnamon, nutmeg, salt and brown sugar. Stir until well blended. In a separate bowl mix the eggs, milk, butter and applesauce. Make a well in the dry ingredients and stir in the applesauce mixture with quick strokes just until well moistened. Fold in the nuts. Spoon the batter into the muffin cups, filling them three fourths full. Bake 20 to 25 minutes.

I've tossed a bunch of chocolate chips in these once and they tasted great that way as well.

Oatmeal Sheet Cake

Description:
This is straight out of our "Joy of Cooking" cookbook. It's one of Rob's favorite cakes. I'm making it today for the potluck that will be following the girl's play. (A friend of mine organized several girls into a play that they wrote and directed themselves.)

Ingredients:
1 cup old-fashioned rolled oats (i use the thick rolled from wild oats.)
1 1/2 cups boiling water
1 1/3 cups all-purpose flour (i usually use freshly ground hard red wheat)
1 teaspoon baking soda
1 teaspoon ground cinnamon
1/2 teaspoon ground nutmeg
1/2 teaspoon salt
8 tablespoons (1 stick) unsalted butter
1 cup sugar (i use sucanut.)
1 cup packed light or dark brown sugar
2 large eggs
1 teaspoon vanilla

Directions:
The recipe recommends making this a day or two before serving but I rarely plan that far in advance. It tastes just fine when it's fresh.

Combine the oatmeal and hot water and let them stand for 20 minutes.

All of the rest of the ingredients should be at room temp. (I can't even plan THAT far in advance. My ingredients are rarely at room temp.) Preheat the oven to 350 F. Grease one 13 x 9 inch pan.

Whisk together the flour, soda, cinnamon, nutmeg and salt. In a separate bowl beat the butter and sugars until they're "lightened in color and texture." (Given that I'm using sucanut and dark brown sugar, that never happens for me. But I beat it about 5 minutes while I grease the pan and clean up the dishes from so far.)

Add the eggs and vanilla, the the oat mixture, then the four mixture. Scrape the batter into a pan and spread evenly. Bake until a toothpick inserted in the center comes out clean, about 30 minutes. let cool briefly in the pan on a rack.

They then recommend icing it with some broiled icing recipe that I've never tried. I usually take a brick of cream cheese, beat the loofah out of it, add about 1/4 cup sucanut, beat it some more, and spread it on top of the cake. i sometimes toss a few flower petals or pieces of fruit on top to make it look nice.

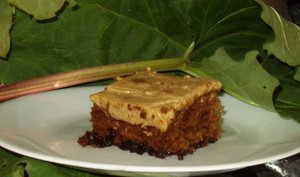
(optional) When my rhubarb is going bonkers I usually pull out a bunch, chop it up and add it to the recipe. As my mom has said, "I've never been able to add too much rhubarb." I know I've added at least 2 cups and it didn't seem any more than when I had had 1 cup. It's a great way to use up rhubarb and it adds a little tartness and juiciness to the cake.

July 7, 2006

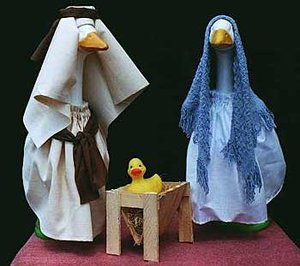
Cavalcade of Bad Nativities


Ideally I'd wait until Christmas time rolls around again to post this link, but as Sara (I think that's her name) says, "I've just been alerted to something so very, very wrong, it cannot wait."

Here's some more quotes:

"Once again proving that the only thing better than a cheap nativity is a cheap nativity with fiber optic holiness-indicators..."

"apologies for all the big images, but if I compress them too much, you lose the horror. "

"I don't know about you, but I never want to have to decide if I should eat the baby Jesus feet-first or head-first."

"God came to earth...as a hobbit."

The quotes are just a foretaste. The pictures bring it all to life. So here you go, a little bit of Christmas in July. Enjoy!

July 4, 2006

Cream Cheese Brownies

Description:
This recipe is directly from my Betty Crocker cookbook... more or less. ;-)

It's so good that I'm making it for the third time this week. Plan for gooey brownies, though. If you want clean fingers when you're done, eat these with a fork.

Ingredients:
brownies
-------------
1 package chocolate chips cookies (Betty calls for 5 oz. of chocolate, but she's obviously not thinking straight. The chocolate chips I use, Rapunzel, come in 10 oz. bags.)
2/3 c. butter
1 3/4 c. sucanut (or sugar if all you have is the chemically bleached stuff)
2 t. vanilla
3 large eggs
1 c. whole wheat flour (or the chemically bleached stuff)

cream cheese filling
-----------------------------
2 packages of cream cheese (8 oz. each)
1/2 c. sucanut
2 t. vanilla
1 large egg

Directions:
heat oven to 350 F. grease bottom and sides of brownie pan. (betty says to use a 9-inch square pan. but i've been using something closer to 9 x 13 and the brownies have been coming out fine.)

melt butter and chocolate over low heat, stirring constantly. cool 5 minutes.

in medium bowl, beat sugar, vanilla and eggs with electric mixer on high speed for 5 minutes. beat in chocolate mixture on low speed, scraping the bowl occasionally. beat in flour just until blended. (stir in walnuts if you're nutty enough to want that kind of thing. i'm not.) spread in pan.

for cream cheese filling: mix softened cheese (cream cheese isn't really cheese. did you know that?), sucanut, vanilla and egg. spread on top of the brownie mixture and, using a spatula, spread the lumps out a bit to cover as much of the top of the brownie mixture as possible.

bake for 45 to 50 minutes.

Modified Fruit Cake (Trail Mix Version)

Description:
For her birthday, my grandmother decided she wanted a fruitcake. So, though I couldn't marinate it for months, I decided to make one anyway. It turned out to be a hit. Unfortunately, I didn't save the page that I got the recipe from. So today I decided to make my own version of fruit cake -- a sort of trail mix version, without the peanuts.

Ingredients:
1/2 c. - 1 c. currants
1 T. orange rind
1/2 c. - 1 c. raisons
1/2 c. dried, sugared pineapple
1/2 c. dates
1/2 c. dried sweetened cherries (not the overly sugary candied variety)
1/2 c. dried papaya
4 c. pecans
2/3 c. oatmeal (i used thick-rolled oats)
1 3/4 c. whole wheat flour
1/2 t. baking powder
1 c. softened butter
1 c. sucanut
5 large eggs
rum or brandy

Directions:
soak the currents, raisons and orange peel overnight in rum or brandy. (i used just enough almost cover the fruit.)

set the oven to 250 degrees (F). beat the butter and sugar until well mixed. add eggs one at a time. scrape the bowl to make sure the eggs are well mixed in. add the flour and mix just until the flour is thoroughly mixed in. add the pecans, oats, and fruit.

pour into 2 loaf pans that have been lined with wax paper. cook for 2 1/2 hours.

serve with a light dusting of powdered sugar on top.

June 13, 2006

I've moved my blog to Multiply. (In fact, it's been there awhile now. I just haven't gotten around to mentioning that here.)

May 4, 2006

Puffy Pancake

Description:
My Betty Crocker cookbook was on it's last legs so Rob told me I could buy a new one as a Christmas present from him. I finally got around to ordering one in January some time, but I, for some reason, ordered a Better Homes cookbook by mistake and was dismayed that it was entirely different from what I had wanted.

However, this cloud came with a really tasty silver lining. It's generally the pancake section of all of my cookbooks that is the first to go and so of course it was to the pancake section that I first turned. They didn't have a single normal pancake recipe but there is a recipe for a "Puffed Oven Pancake" (which was the only recipe that I had all the ingredients for, so I went for it).

The Puffy Pancake has since become our all time favorite breakfast as well as a really enjoyable dinner on two occasions. It takes me all of 2 minutes (max.) to whip up, 20 minutes to cook and maybe a minute or two of cleanup. Who could ask for a better warm breakfast?

Ingredients:
3 eggs
1/2 cup flour (i use whole wheat)
1/2 cup milk
pinch of salt
some butter for the pan
fruit or jam or some such for a topping

Directions:
This recipe makes just enough for the three kids for breakfast. If I want to include myself then I double the recipe. I use a medium sized cast iron pan for a single recipe and a larger pan for a double recipe. (The cast iron cleans up much easier. It really puts the Calphalon to shame.) The key to your pan choice is that it should be able to go into the oven. I'm sure a casserole pan might work.

Throw some butter (the recipe book says 2 tablespoons but I always just throw in a wad -- that's a technical term for just the right amount of butter) into the pan and put the pan in the oven (which should be set to 350 degrees).

Throw the eggs, flour, milk and salt into a small bowl (I just use a measuring cup with high sides) and mix thoroughly with a whisk or fork. Once the butter is melted, pour the mixture into the pan and let bake for about 20 minutes (until puffy and very slightly browned).

For breakfast I put about a teaspoonful of jam on each kids third of the pancake. For dinner I heat two bags worth of frozen fruit and add a bit of jam to sweeten the mixture. I then pour the warmed fruit over the pancake and serve. (I can't wait till summer when I can use fresh fruit!)

We don't use syrup on our puffy pancakes. The jam is enough to sweeten the dish, which makes this a pretty nutritious meal without all the sugar that's often in breakfast cereals or poured (in the form of syrup) over the usual pancake, waffle or french toast meals.

Molten Chocolate Baby Cakes

Description:
This recipe is from the New York Times food section (December 14, 2005).

These little cakes really don't take long at all to make and are ooooooooooooohhhhh so yummy! A dollop of whipped cream and maybe a smidgen of jam go well on top.

I've never made a single batch. I knew from the first time I ever made them that this is one of those recipes that should automatically be doubled or tripled.

Ingredients:
4 tablespoons soft unsalted butter, more for greasing dishes
12 ounces bittersweet or semisweet chocolate (preferably with 70 percent cocoa solids)
4 large eggs
Salt
¾ cup superfine sugar
1 teaspoon vanilla extract
1/3 cup flour.

Directions:
1. Place a baking sheet on center rack in oven and heat oven to 400 degrees. Butter insides of six 6-ounce heatproof glass or ceramic baking dishes. (If using soufflé dishes, line bottoms with parchment paper; dishes with flared sides will not need lining.) -- I used muffin tins. Call me gouche, I know.

2. In a small saucepan over low heat or in a microwave oven, melt chocolate; set aside to cool slightly. In a medium bowl, beat eggs together with a pinch of salt until frothy; set aside. Using an electric mixer, cream together 4 tablespoons butter and the sugar. Gradually add egg mixture, then vanilla. Add flour and mix well. Add chocolate and blend until smooth.

3. Divide batter among six baking dishes and arrange them on baking sheet hot from the oven. Bake until firm and dry on surface, 10 to 12 minutes. Remove dishes from oven and immediately invert cakes onto small plates or shallow bowls. Serve hot. -- The only problem I found with serving them hot was that the whip cream melted. But no one seemed to mind.

Memories in the Making - 2006


The Northern Colorado Alzheimer's association accepts drawings from victims of dementia throughout the year. They then choose 52 pieces for an annual auction which is held in June and raises 25K or more to fund programs run by the Alzheimer's association in the area.

My dad has had at least one submission chosen each year for the past three years. (In 2004, his water color was their signature piece.)

In May, the association has a tea to honor all of the artists whose pieces were accepted.

Here are the pics from this year's tea. (I may dig back and add the pics I took in 2005 and 2004 as well if I can find them.)

April 23, 2006

Pick's Disease

It looks like only 1 minute of this video loaded. 
To see the full video, click through to watch it on YouTube


My dad was diagnosed with Pick's disease in the year 2000. I put together this movie in order to help people better understand what it is my family (especially my mom) is going through.

This movie is just over 6 minutes long.

To get to the online support group that is mentioned at the end of the movie, you can just click here. (That group will end when Multiply does. But I've found a new community on Google that looks promising (12/22/12.)

April 10, 2006

Gateau Reine De Saba

Description:
I found this recipe in the New York Times food section (2 Feb. '05) It doesn't contain any wheat flour. Instead, finely ground almonds takes the place of the flour and gives this cake a slightly gritty texture.

This was a very moist cake, made all the more so by the fruit sauce I poured over it. (I made this cake for Rob's birthday and he loves sauce.) The cake came with a recipe for a glaze which I didn't use. I'll include both the glaze recipe and my fruit sauce recipe here.

Ingredients:
For the cake:
12 tablespoons (1 1/2 sticks) butter, more for pan
6 ounces bittersweet chocolate, chopped into small pieces
A few drops almond extract (next time I'm putting in at least a teaspoonful)
2 tablespoons strong coffee
4 large eggs, separated
pinch of salt
1 cup sugar (i used sucanut)
1 3/4 cup finely ground almonds (i used almond meal from Trader Joe's)

For the glaze:
2 tablespoons sugar
1 tablespoon corn syrup
4 ounces bittersweet chocolate chopped into small pieces
1 tablespoon butter

For the fruit sauce:
1 package frozen fruit (I used strawberries.)
1/2 cup agava nectar or other sweetener (honey, sugar, sucanut, etc. don't use molasses or sorghum. both would be too overpowering.)

Directions:
1. Prepare cake: Heat oven to 325 degrees. Butter a 9-inch springform pan, and line the side wall with parchment paper. (I just buttered the sides instead of using parchment paper.) In a heavy bottomed pan, combine 12 tablespoons butter, 6 ounces chopped chocolate, almond extract and coffee. Melt over low heat, then transfer to a bowl and allow to cool.

2. With an electric mixer, whisk egg whites and salt until soft peaks form. Slowly add 1/2 cup sugar until thick and glossy. Set aside.

3. In a separate bowl, whisk together egg yolks with remaining 1/2 cup sugar until thick. Fold in the melted chocolate mixture. Add ground almonds and mix well. Whisk in a dollop of egg whites to lighten mixture. Using a rubber spatula, gently fold in the rest of egg whites, keeping batter airy.

4. Scrape batter into pan and bake until cake is dry on top and a bit gooey in center, 30 to 40 minutes. (After 30 minutes of baking, check center of cake with a tester or toothpick. If center seems very wet, continue baking. ) Cool cake on a rack for 20 minutes, then remove side of pan. Allow to continue cooling. Top of cake may crack as it cools, but glaze will cover most cracking.

5. Prepare glaze (or skip this and go to the fruit sauce directions (#7): In a small saucepan, combine 2 tablespoons sugar, the corn syrup and 1/4 cup water. Bring to a boil, then remove from heat. Add 4 ounces chopped chocolate, swirl pan to mix, and allow to stand until melted, about 3 minutes.

6. Whisk 1 tablespoon butter into icing, then pour evenly over cake. Use a spatula to ease icing out to edges of cake. Allow icing to cool and set before slicing.

7. Prepare fruit sauce: Dump one bag of frozen fruit into a pan with sweetener of choice. Thaw fruit over very low heat. When the fruit is soft enough, mash it up a bit a potato masher. Once the sauce is warm all the way through, pour a bit of it (1/2 cup or so) over the cake. Put remaining sauce into a gravy bowl or some other bowl that guests can use to add more sauce to their cake if they'd like.

Mexican Chocolate Icebox Cookies

Description:
I found this recipe in Jan./Feb. 2005's issue of Saveur magazine (an excellent magazine by the way. the recipes online simply do not do the sum total of the magazine any justice at all. saveur melds food, history, culture and recipes into a beautiful gastronomic/cultural delight. ... how's that? you're getting a magazine review and recipe in one. ).

i made an almond/chocolate cake for rob's birthday as well as these cookies and he said that of the two, these cookies were hands down the better dessert.

they've got a bit of a kick to them, though. these are not your grandma's chocolate cookies. though rob (and my brother-in-law as well) thought these cookies rocked, i personally didn't really like them.

Ingredients:
1/2 cup flour (i, of course, used whole wheat.)
3/4 cup quality dutch-process unsweetened cocoa (i didn't have any dutched cocoa so i made the cookies with what i had on hand. they didn't hold their shape and maybe the cocoa is the reason why. but the taste was still right on.)
3/4 tsp. ground cinnamon
1/2-3/4 teaspoon cayenne (see where the kick comes in?)
1/4 teaspoon salt
1/4 teaspoon freshly ground black pepper (and another bit of a kick)
1 cup sugar (i used sucanut)
1 1/2 teaspoon vanilla extract
1 egg
12 tablespoons cold unsalted butter, cut into small pieces

Directions:
1. Whisk flour, cocoa, cinnamon, cayenne, salt, and pepper together in a medium bowl and set aside. Put sugar, vanilla, and egg into a large bowl and beat with an electric mixer on high speed until thick and pale, about 3 minutes. Add butter and continue to beat on high speed until smooth, about 3 minutes more. Using your fingers, work flour mixture into butter mixture until dough is just combined.

2. Divide dough in half and roll each half into a 9" log. Wrap each log in parchment paper, twisting ends tightly to make a uniform cylinder. Freeze dough logs for at least 8 hours and as long as overnight.

3. Preheat oven to 350 degrees. Unwrap dough and slice each log into rounds about 1/3" thick. Place rounds 1/2" apart on parchment paper-lined cookie sheets. (I didn't use parchment paper and they didn't stick.) Bake cookies until slightly puffed and tiny cracks appear on the surface, about 8 minutes. Transfer cookies to a rack to let cool.

February 9, 2006

Meggo French Toaster Sticks

Description:
Nathan loves Saturday morning cartoons, and unfortunately, with Saturday morning cartoons comes Saturday morning commercials = crap for kids. When he saw the commercial for Eggo French Toaster Sticks he wanted to try them. I wasn't about to buy the things, so I made my own version. He loves it, and I know he's eating preservative free food. It's a win-win.

I've got the making of these things down to an art and can pump them out in 5 minutes or less.

Ingredients:
2 slices bread (i use Wild Oats brand whole wheat)
1 egg (cage free, etc.) ;-)
12 chocolate and 12 peanut butter chips (or 24 all one type)
a wee bit of maple syrup.
a bit of butter

Directions:
Toss some butter into a fry pan and blast the heat. (We have a gas stove, so there's no lag time. A blast is a blast.)

While the butter is melting, grab an egg, scramble it in a wide flat bottomed bowl. Grab the pan and swirl the now melted butter around with one hand, turn the heat down to medium with the other. Grab the bread, toss it in the egg quickly (don't let it soak, people! that only makes for soggy french toast!) and in the same motion throw it on the frying pan. You've got to cook both pieces at the same time so if your frying pan isn't big enough, buy a new frying pan. Flip the bread around a few times till it's lightly browned. (Anything darker than *slightly* brown is considered burnt by my hoard.)

Here comes the fancy footwork. Take both pieces of toast out of the frying pan or else they'll cook too long and your kids will whine that you burnt the stuff. On a cutting board carefully push a knife most of the way through the bread, but not all the way through. This takes practice. Too much push and the kids have nothing to pull. Too little push and the kids won't get a nice clean line when they tear their toast apart.

Put one piece of toast (cut into four still connected slices) onto a plate. Put three chocolate chips pointy side down on the first slice, then put peanut butter chips on the second slice and so on. Quickly chip up the second piece of toast and toss it onto the first so the chips can melt and ooze all over the place.

Pour a wee bit of maple syrup into a small bowl and set that beside the toast on the plate.

Viola!

January 22, 2006

Oatmeal Fruit Bar Cookies

Ingredients:
2 cups rolled oats
1 cup flour (i use whole wheat)
1/2 teaspoon salt
1/2 teaspoon cinnamon
1 teaspoon vanilla
1/2 cup sweetener
1/2 cup butter
2 cups fruit (save juice)
2 tablespoons reserved fruit juice

Directions:
Mix everything together except the fruit and fruit juice until you have a crumbly mixture. Add fruit juice to hold crumbs together.

Spread half of the crumb mixture into the bottom of an 8 in. x 8 in. pan. Spread the fruit on top of that and cover with the remainder of the crumbly mixture.

Bake for 30 minutes at 375 F. The recipe i took this from says you should cut this into 24 bars but between Rob and myself we managed 2 servings each plus I was able to set some aside for his plane trip tomorrow.

Meg Notes: For the one cup flour, I mix in a little of whatever is on hand: freshly ground hard red wheat and corn flour, for instance. For the 1/2 cup sweetener, I've used 1/4 c. sucanut and 1/4 c. maple syrup or just 1/2 c. sucanut. i may try it with agave nectar some time.

Variation: I've also made this with dried fruit mixed with a little orange juice concentrate. I didn't like it as much but Nathan preferred it. Another thought, and I haven't tried this yet, would be to cook down some apples and put them in the middle.

December 28, 2005

Meg's Americanized Enchiladas

Description:
I originally got the idea for these enchiladas from the More-With-Less Cookbook, but they've probably morphed quite a bit from that by now. (I don't really know because I haven't looked back at the recipe in probably 15 years.)

Ingredients:
- 1 jar of your favorite salsa. (i usually use Frontera's Jalapeno Cilantro Salsa.)
- 1 package whole wheat flour tortillas (note: wheat flour tortillas and whole wheat flour tortillas are different entities.)
- 1 can beans (refried or whole, it doesn't matter. black or pinto also doesn't matter. i always use black (i think they're tastier.) but will use refried or whole based on what i have on hand.)
- meat is optional. i sometimes fry up chunks of chicken and toss that in for the kids' and rob's benefit.
- cilantro is optional. i love the flavor, but i don't always have any one hand.
- onions are optional.
- lots of cheddar cheese. (i like to really heap it on top so the size of your container will determine the amount of cheese you need.)

Directions:
Pour a little (maybe 1/4 cup) of the salsa into the bottom of your pan. I usually use a brownie pan to make my enchiladas in. Wiggle the pan until the salsa has covered every bit of the bottom. This should keep your enchiladas from sticking to the bottom of the pan.

If you're going to add meat and/or onions, cook them up in advance. I don't think I've ever put beef in, but I don't see why you couldn't. If I add meat it's usually diced cubes of chicken that I've fried up in a bit of oil. When I add onion, I usually chop up one medium sized onion and fry that in a bit of oil.

To make the enchilada, hold a tortilla in one hand and slop some beans into it with the other hand. If you want to add meat, tofu, cilantro or onions (or even cheese) you can do that now. When I make these, I often just put the beans inside (because I've forgotten to fry up the onions in advance) then I throw any other extras on top of the rolled up tortillas later. Roll up the tortilla until you have a long tube and smash it into one end of your pan. (I say smash because often the ends of the tortilla are longer than the width of the pan. You don't want those ends sticking up because they'll dry out so try to mush them down in. Also make sure they get well covered with salsa and cheese later.)

Once you've filled the pan with filled and rolled tortillas, throw any other extras on top that you might have forgotten to stick inside. Then dump the rest of the salsa on top of the enchiladas and make sure to spread it everywhere. Anything not salsa covered will most likely dry out in the oven and be kinda yucky.

Next, cover the top with cheese. When I used to make these, I'd take the time to grate the cheese and pour that on top. Now I'm too lazy, so I just pull out the cheese slicer, make several slices and use that to cover the top.

Everything currently inside your enchilada pan is either pre-cooked at this point, or can be eaten without having been cooked. So your goal isn't really to cook everything up as much as to warm it through and melt the cheese. I usually put these in the oven (at 350) for about 20 or 25 minutes. Once the cheese is starting to brown I know they're ready.

You'll notice that in the picture I've dug in from two sides. The closer side has chicken, for the kids. The farther side is where my veggie version was located. :-)

December 22, 2005

Pirogi / Pedaheh

Even though the little forms we used did the edge crimping for us, I still liked to pinch a bit more just to be sure the pirog was completely closed up. Otherwise we'd lose most of the filling during the boiling later.

My dad's family is Ukrainian (his grandparents came over in the early 1900's). One Ukrainian (Byzantine Catholic) tradition that we try to keep when eating with my grandmother is to avoid meat on Christmas Eve. So for this Christmas Eve we are going to have homemade pirogi (I use this name for them because more people seem to be familiar with it, but I believe that is the Polish term. My great aunt has fits every time I say pirogi. It should be pedaheh.) and hopefully a Salmon Wrapped in Pastry dish that my dad used to make. (But he can't really help us with it any more. So it might all depend on whether we can find his old recipe.)

Though my great granny (the one off the boat) used to make pedaheh for us, my grandmother (the next generation down) never made it. And my mom is (mostly) Irish, so she sure couldn't teach me. Therefore, though I'm using someone else's recipe (I can't even remember whose at this point.) the whole procedure that I go through is pretty much my own. I'm sure it's pretty similar to what other pedaheh makers go through. But then again, what do I know? I've never made pedaheh before with anyone else that knew what they were doing.

So without further ado - Pirogi making by Meg and company, recipe included.

The recipe has been lost in the transition as Picasa doesn't have the means of posting a lot of text along with each separate photo. But you can still get the main idea here. I'll try to add ingredients at some point.


December 19, 2005

What IS the reason for the season?

A new phrase became popular (in some Christian circles, at least) about a decade ago: "Jesus is the reason for the season." I started seeing this plastered across shopping bags (from Christian stores that were capitalizing on the commercialism of Christmas) and this year I've heard my daughters singing a song by that title that they apparently
learned in Sunday School. But is Jesus really the reason for the season?

The holiday currently referred to as Christmas actually began long before the Christ was born for whom the mass is said. The winter solstice has long been a cause for celebration, not only because it marks the beginning of longer days, but it was also the time when many farm animals were slaughtered and their meat preserved for the winter (as it was far more cost effective to turn them into meat than to try to feed them through a long, hard winter).


In Scandinavia, the Norse celebrated Yule from the end of December until the beginning of January. The men would find the largest logs they could and, after hauling them back to the village, would set
them ablaze. The citizens would then party for as long as the log burned, sometimes for as long as 12 days (hence the 12 days of Christmas).


In Germany, many believed that the god Oden would fly overhead at night determining who would prosper and who would perish in the coming year ("gonna find out who's naughty and nice").


The Romans celebrated for an entire month each winter, honoring the god Saturn in a festival called Saturnalia. During that time food and drink was plentiful, the poor were treated as royalty with the rich waiting on them, and gifts were given.


Many upper class Romans also celebrated the birth of Mithras, god of the unconquerable sun, on December 25th. This was often considered to be the most important holiday of the year. The emperor
Constantine was said to be a follower of Mithra before his supposed conversion to Christianity.


There is no where in the Bible that states what day Jesus was born, nor that it should be celebrated by his followers. Though Jesus commanded his disciples to remember his death and resurrection (which takes place every Easter (Btw, Easter is the name of an Anglo-Saxon goddess.) as well as with every serving of communion), he never spoke of his birth as an item of note.


The first evidence of a Christian feast of the Nativity (which is what Christmas was called before it was called Christmas) is found in 200 AD in Egypt, and was celebrated in spring (at times in either March, April or May). In time, Christians were celebrating the Nativity on many different days, most on the same day as the feast of the Epiphany, January 6th. But in the 380's AD, Chrysostom gave a
sermon in which he argued that December 25th was the most appropriate day for the celebration and apparently the church fathers agreed. Christmas wasn't called by that name until some time in the middle ages (some say as late as 1810) when Christ Mass was contracted.


In the early 17th century, the rise of Oliver Cromwell and the Puritans led to an abrupt about face concerning the celebration of the Nativity. Generally a time of raucous debauchery, the Puritans
outlawed it entirely. The pilgrims brought this attitude with them when they came to the Americas and from 1659 to 1681, Christmas was outlawed in Boston. Even in other parts of the country, Christmas
was seen as an English holiday and not celebrating Christmas was a sign of independence. Eventually that mindset eased and on June 26, 1870, Christmas was declared to be a national holiday.


Over the next 135 years, Christmas has continued to morph and change, keeping the gift giving it inherited from Saturnalia, as well as the holly and mistletoe from pagan fertility rituals, but adding on a
distinctly American component as well -- Santa Claus as we know him today, a rolly polly man in fluffy red and white vestments. The Christmas that most Americans celebrate today is a well blended series of pagan rituals with a dab of "Christian meaning" tossed in.


That's certainly not to say that Christmas can't still be a meaningful time for Christians. Recognizing that God would be willing to take on human flesh for mankind's sake is definitely a cause for
celebration. But at the same time, for Christians to get in a huff that some stores would hang signs saying "Happy Holidays" rather than "Merry Christmas" is akin to early Romans who might have
complained that their celebration of Mithra was being co-opted by some odd group of monotheists (also referred to as atheists since they had no pantheon of gods).


So go out and find the largest log you can and throw it on the fire. Kill the fatted calf and pour the ale. Hang the mistletoe and string the evergreens about the house. Give gifts and make merry, for tomorrow is SaturnaliaJuvenalia, Yule, the birth of Mithra, the Feast of the Nativity, Christmas!!!

December 8, 2005

Make-a-flake


http://snowflakes.lookandfeel.com/
oooh, cool! now i can have the kids make their own snowflakes without having to clean up a bunch of teeny little pieces of paper all over the floor.

June 15, 2005

Double Chocolate Pound Cake

Description:
Rob's dad gave us a Kitchen Aid for our wedding. It came with a cook book which has a great Chocolate Pound Cake recipe in it. I haven't made this since we were first married because I forgot which book the recipe was in. But I'm clearing out my cookbook shelf and found one page in this book that's covered with stains, a sure sign that it contains a good recipe.

Ingredients:
3 cups sifted cake flour (i haven't sifted flour in about... 25 years)
3 cups sugar (wow! i'd forgotten how much sugar it calls for!)
1 cup cocoa
3 T baking powder
1 t salt
1 cup butter, softened
1 1/2 cups milk
3 t vanilla
3 eggs
1/4 cup heavy cream

Directions:
Mix dry ingredients in a bowl. Make a well in the canter and add softened butter, milk and vanilla. Attach bowl and flat beater (on your Kitchen Aid). Turn to Stir Speed for 1 minute or until mixed. Stop and scrape bowl, turn to Speed 6 and beat 5 minutes. Stop and scrape bowl.

Turn to Stir Speed and add eggs, one at a time, beating 15 seconds after each addition. Add cream and beat 15 seconds. Turn to Speed 4 and beat for 15 seconds.

Pour batter into a greased 10-inch tube pan and bake at 325 degrees F for 1 hour 40 minutes or until pick inserted in center comes out clean. Cool cake completely before removing from pan. Do not invert pan.

(I'll add a pic next time I make this.)

Kicked Out of the Adult Day Care Center

My dad was kicked out of one of the city's adult day care centers today -- one that was opened specifically for him.

My dad was diagnosed with Picks Disease about 6 years ago and he's been attending Elderhaus once a week for the past five years. About six months ago the center decided to open up another branch specifically for people like my dad who are still very active, despite their mental decline. (My dad walks anywhere from 2 to 6 hours a day. He particularly likes to walk through parking lots where he can search for coins.)

My mom has been reluctant to take my dad to the new center because the few times she's gone there, the people seemed somewhat upset that my dad was going to be there for the day. And yet when I would pick my dad up from the old center the director would ask me repeatedly why my mom wasn't making use of the new center more often.

But today when my mom went to take my dad to the new center (which she's been trying to use more ever since i got on her case about it -- mostly because the director was getting on my case about it) she was told that dad had been barred from their program because they can't watch him well enough. (They hadn't even had the decency to call in advance and let mom know that dad couldn't come. She'd already made plans for the day and then found out this morning that they wouldn't take him.)

People ask me how my dad is doing and if there's any change in the situation and usually there's not much to report. But within the last year my dad has become much harder to care for and my mom is
definitely in far more need of support now than when we first moved here four years ago to help her out. I may be moving back to San Francisco in a year (so that Rob will no longer have to commute 2000 miles to get to work) and I was counting on my mom using more of the city's services to help her survive.

Now it looks like that will be out of the question.

This picture of my dad was taken a few days ago. My sister has laminated a card and had pinned it on to him. It says, "My name is Les Kool. I have dementia. I like to look for coins in parking lots. If this is
a problem please call" and then it lists her number, my mom's number and my number. People have called the police on him once before because they were creeped out that this older man was wandering around their apartment parking lot and my mom has overheard people in other locations talking about my dad and how he makes them feel uncomfortable. My dad wouldn't hurt a fly. He's just... weird, thanks to Picks disease. This is a man with a PhD in Economics from Temple University. Thankfully he is completely oblivious to all that has happened to him. If he knew, it would break his heart.


June 9, 2005

Hail Storm - June 9th


I could tell that a storm was coming because I could hear the rumble of thunder from aways off. So I brought in bike helmets and toys that had been left outside. If I had known it was going to hail (coming down as hard as bullets) I would have at least brought the potted plants against the house. The rhubarb is completely shredded, two tomato plants are quite unhappy and my purple pepper plant pretty much has no leaves left on it whatsoever.

June 2, 2005

Bread Pudding

Description:
Barb recently posted her Bread and Butter Pudding recipe and we've since gone back and forth about whether this is essentially the same as bread pudding or not.

So, in an effort to finally know for myself what, exactly, the difference is, I have made both my version of bread pudding (which is really Betty Crocker's version) and Barb's version of bread and butter pudding.

When I make bread pudding, I usually use leftover bread that I've set out to harden. Today's version included half whole wheat bread rinds (We always called them "keenchicks" in our family. I've always assumed that was Ukrainian, but I don't really know.) and half cinnamon buns (which are white bread rolls with cinnamon chips in them that we get from the local bakery).

To be completely fair, I used the same ratio and types of bread in both recipes.

Ingredients:
2 cups milk
1/4 cup butter
2 eggs, slightly beaten
1/2 cup sugar
1 t. ground cinnamon or nutmeg (i always use cinnamon)
1/4 t. salt
6 cups dry bread cubes (8 slices of bread)
1/2 cup raisins, if desired

Directions:
Heat oven to 350 degrees F. Heat milk and margarine over medium heat until margarine is melted and milk is hot. Mix eggs, sugar, cinnamon and salt in 4-quart bowl. Stir in bread cubes and raisins. Stir in milk mixture. Pour into ungreased 1 1/2 quart casserole. Place casserole in pan on oven rack. Pour very hot water into pan until 1 inch deep.

Bake uncovered 40 to 45 minutes or until knife inserted 1 inch from edge comes out clean. serve warm and, if desired, with cream. (which i think is a bit over the top if you ask me.)